


After developing a prototype forest scene a while ago, I wanted to somehow improve the terrain textures to look sharper and have more detail. I have been thoroughly inspired by the environment art of an indie action RPG that is in the works called Grim Dawn. After some pointers by other Unity developers I recently found a way to get the terrain in Unity to incorporate bump mapping. I have been pleased with the results and wanted to pass along instructions on how to do it and a few other tips I have learned to achieve nice terrain.
The Unity terrain system does not officially support bump mapping and there are complications to using it with regard to light maps. To get bump mapping into Unity’s terrain you need to provide your own terrain shaders that replace the built in ones. Luckily there are smart folks who have already done this and were kind enough to share them. They can be downloaded from SIXTIMESNOTHINGalong with a script for configuring them in the terrain instance. You also need a tool to produce the normal maps if they are not provided with your terrain textures. A tool called ShaderMap was recommended to me and I found it to work very well with lots of options to tweak the results, and also found it very affordable. Additionally if you have displacement maps or can create these, then you can also tell Unity to use them as a normal map and tweak the bumpiness and filtering (smooth or sharp) directly in the Unity editor. This approach is what I finally settled on. In general just producing a bump map from the texture is not enough. If you are artistic you can try and add some more depth to the displacement map. One last technique which I may try in the future is to use the Bitmap2Material filter provided on the asset store which uses the new features of 3.4 to generate the normal map and others on the fly at install or runtime which reduces build size.
Once you have the replacement terrain shaders somewhere in your assets folder and you have your normal maps created, it is simple to configure them in the script which must be attached to the terrain instance in the scene. You must assign the normal maps which must be the same resolution as the terrain textures and set the tiling the same as you have configured in the terrain paints.
In general I have found that determining the right tiling is critical to having good looking terrain to begin with. You should also spend more of your texture budget on having larger texture sizes than you normally would and increase the aniso level as this helps reduce artifacts due to the texture being viewed at an angle off into the distance. Additionally, changing the filtering to trilinear can often make the transitions between mip map levels smoother, again helping as you look out over long distances. One other area of adjustment is changing the method used to generate the mip maps. You can try setting this to the Kaiser filter over the Box filter to get a sharper image. I have found also that it is best to keep all of these settings the same for both the texture and the normals, so the bump mapping is consistent with the texture. There is a good wikipedia entry on mip maps that can give you some technical background to understand what is going on with them.
A larger issue is that if you want to use light mapping and bump mapping on the terrain you must switch the rendering path to deferred lighting in the player settings and switch your light maps to dual. This presents issues as the deferred lighting rendering path is available for pc/mac and likely console builds, but is not possible on mobile. There are also tradeoffs using this rendering path which are explained in the Unity Documentation. The biggest drawback is that anti aliasing is not possible, however since 3.4 Unity has added an AA post processing image effect.
When this is done the near light maps can be used with bump/specular shaders both for the terrain and the static objects being light mapped. The far light maps do not show this detail and it really isn’t needed since everything is shown at a distance in this case. I have also used fog, configured from the render settings, and the depth of field image effect, added to the camera, to provide a better feel of distance in the scene. This ends up generally blurring the detail far away so the bump/specular mapping is not missed.
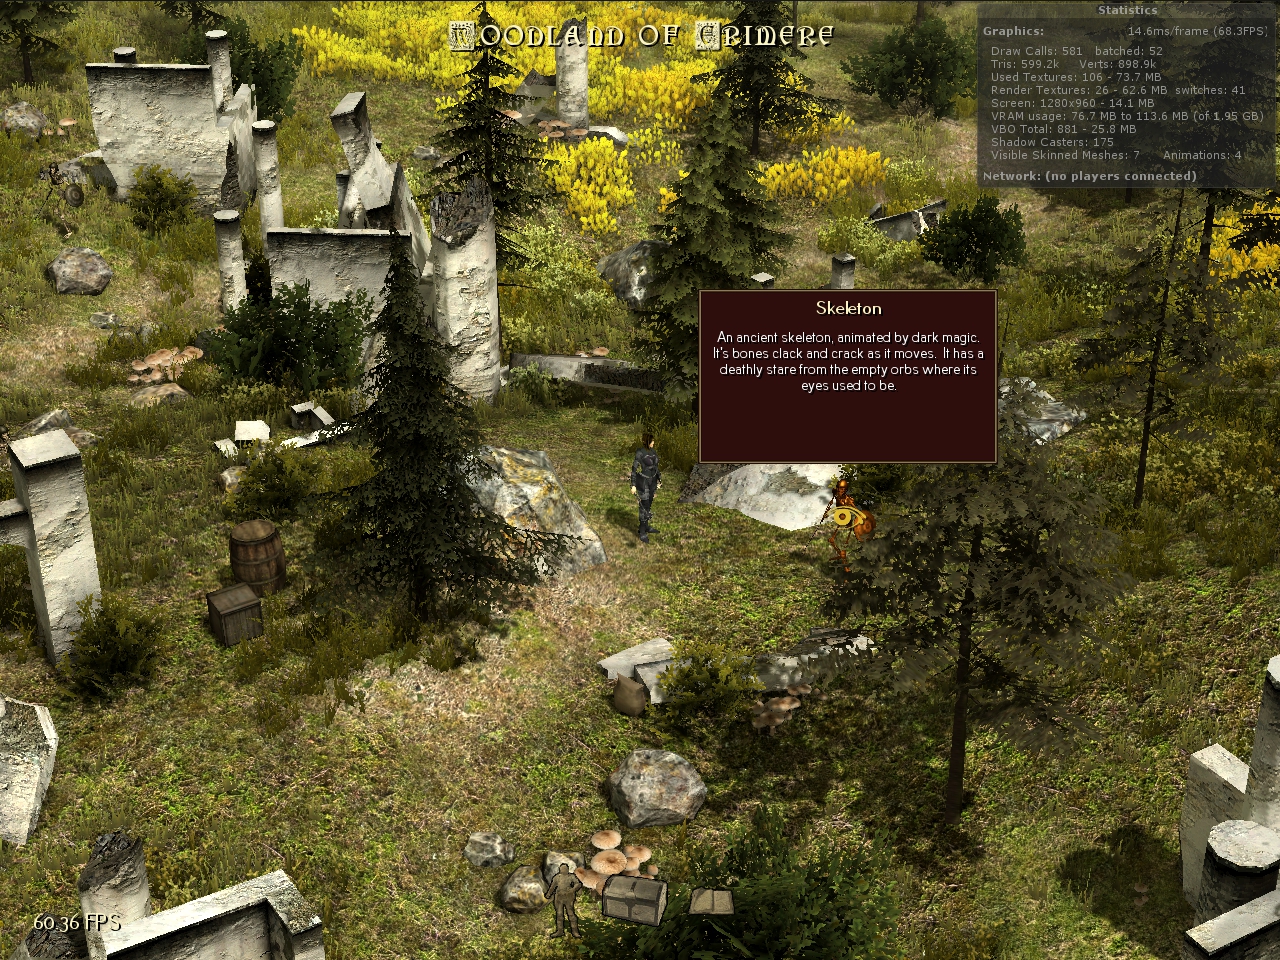
I have produced two screenshots which show the near and far light maps being used on the ruins in the forest scene:
|
|
| Ruins with near light map (with bump mapping on ruins) |
|
|
| Ruins with far light map (without bump mapping on ruins) |

By using the deferred lighting rendering path and dual light maps I was able to achieve rich shadowing of both the ruins and the trees and bushes in the scene as well as displaying bump mapping on the terrain and static objects with the near light maps, all while keeping the number of draw calls low.
In the second part, I am going to try and learn how to achieve decent mood through lighting and post processing effects. I will post my results and provide pointers based on what I learn in the process.